With a million and one things to still do before
school lets out next week, I completely forgot to post these bad boys, but I
definitely like how the lesson went, so better late than never… I think that’s
my slogan these days.
Showing posts with label art. Show all posts
Thursday, June 6, 2013
Color Acrostics
Saturday, June 1, 2013
Book Page Art Poems
I've seen variations of this project floating
around on pinterest for quite some time now and thought it would be a perfect
addition to our poetry unit (although it could be adapted to other areas of
language arts). We all have a book or two that is beyond salvageable our
classroom or library right? Well, don’t be so quick to throw them out because
they can be turned into these beautiful works of art quite easily.
For ours, I had a really old, worn out copy of
The Wind in the Willows that I used as a course book last year. I picked this
particular copy up at a used bookstore when I was home for Christmas last year;
I think I may have spent a whole dollar on it.
Anyway, it was in rough shape so
I tore several pages out and told the students to take a couple of pages and
search for words that stood out that could make a poem and circle those words
lightly in pencil. It was not an easy task for everyone, but I liked watching
them struggle a bit with the challenge. Is that bad? Of course I was there to
help them along, but I really wanted them to start thinking about poetry in a
different context. Some of them are stuck in the it-has-to-rhyme stage and I
wanted to help them see beyond that.
Once the words were found, I showed them a few
examples of recycled book art and let them choose the style they liked best. I put a basket of glitter pens, black fountain pens, and chalk out for them to experiment with on their pages, and here’s what they came up with.
Pretty awesome, right? I highly recommend this one!
Friday, May 17, 2013
Haiku- Mixed Media Art Journals
Well, we’re a couple weeks into our poetry unit
here, and things are going great. We covered the elements of poetry and have
now ventures into the thick of it with acrostic, concrete, and haiku poems. I
wanted to share our haiku project from today because I was really impressed
with their effort on this one.
It’s not every day that your students can grasp
a concept like subtlety, and then show you that they GET IT. It is a beautiful
thing, my friends. Anyway, so after we learned a little about the history and structure
of haikus, we split the class into different seasons and started brainstorming
ways to describe nature in those seasons. Then, once we felt like we had enough
descriptive words down, they went to work making their own seasonal haikus.
Later for art, we looked at some really great
examples of mixed media and art journal pages so they could get a visual of
what our goal was, and started exploring with texture, color, and technique. I
allowed them to use any medium that we’d worked with this year, including
drawing/sketching, painting (watercolor & acrylic), doodling, collage,
stenciling, and sponging. I had to keep reminding them that mistakes could be
covered, and that layers were what make mixed media so cool. Once they got
that, the awesomeness started to emerge… Check out s couple of them below. Have
a splendid weekend!
Spring!
Summer!
Winter!
Fall coming soon!
Friday, May 10, 2013
Mother's Day Poems
Happy Friday, everyone! Well, at least for those
of us living in Asia. It’s May and the rainy season is upon us once again,
which means I’ll be sporting wet shoes and a poncho for the next couple of
months. It really makes me miss having a vehicle with doors and a roof, but
hey, it’s just water, right?
This weekend is Mother’s Day, and coincidently,
we’ve just started our poetry unit, so I thought- what better way celebrate mom
than with a beautiful poem? In language arts we’ve been learning about figurative
language, specifically similes and metaphors, so we read some poems that use figurative
language just to get some ideas. Then, we brainstormed a list of adjectives
that we use to describe our moms.
Later for art, we created a watercolor floral
border to publish out poems on… I got the idea for this project here. Here’s a
few snapshot of our pieces today.
Happy Mom’s Day to all you fierce females out
there. Hope you have a great weekend!
Start with watercolor- be sure to leave a space for your poem!
Any color combo will do...
Once it dries, draw over it with a fine-tip permanent marker or fountain pen (0.5mm)
It's up to you how light or dark the flowers.
Add the final draft of your poem.
Voila! Mother's Day Gift, boss status.
Monday, April 15, 2013
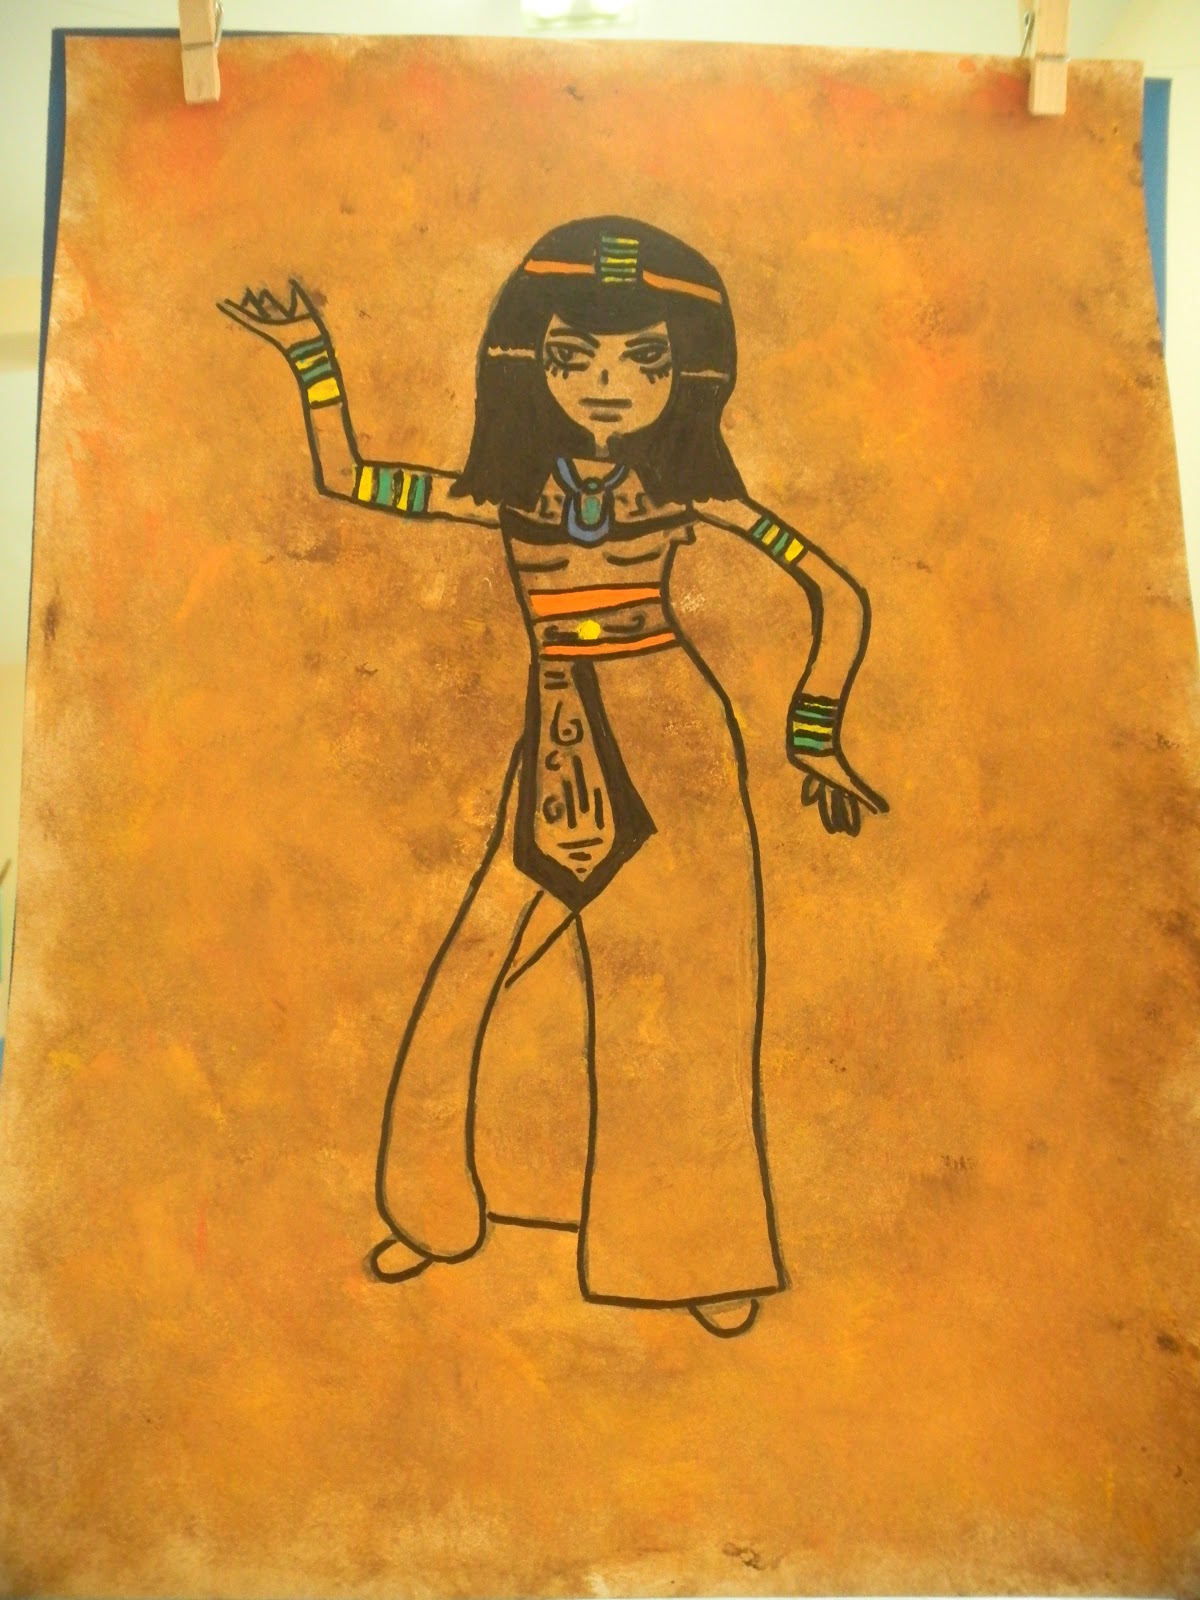
Paint like an Egyptian
Last week’s art lesson was too good not to post…
As you know, we’ve been studying ancient civilizations, specifically the
ancient Egyptians, and what unit would be complete without a look at the
influence of art?
Because the ancient Egyptians were the first to
introduce written language through hieroglyphics and because the symbolism used
by the Egyptians is relatively easy to replicate, I decided to let it guide us
through art last week. I found this lesson over at Ms. Picasso’s art room.
Check it out here. Here’s what we did:
Find a god/goddess-inspired picture that you
like and transfer the image with pencil onto a nice, thick piece of paper. You can
also add a couple of hieroglyphic symbols around the picture just to jazz it
up. After your drawing is complete, trace over the pencil with a black
permanent marker. * Make sure you use permanent marker or else it will bleed
later on when you add watercolor* Once your black marker outline is complete,
sponge paint over it with brown, yellow, and/or orange acrylic paints until it
looks old. Finally, once the acrylic paints have dried, apply just a splash of
watercolor to a few parts of the piece… be sure not to overdo it with the color
as you want it to look as authentic as possible. Here are a few of our
completed pieces. I think they turned out great, what do you think?
Monday, April 8, 2013
Ancient Egypt Lapbook
Sorry about my absence, folks. It’s been a
whirlwind of a week here with history, literacy month, field trips, and upcoming
parent-teacher conferences. I don’t have a whole lot of time to post this, but
I really wanted to share these super awesome lapbooks that we started last week
for our unit on ancient civilizations. I got the idea here, and adapted it a
bit to meet the needs of my own classroom.
What I love about lapbooks and foldables is that
they are fun and engaging for even the most hesitant of learners. I find that
when you leave it up to them to be the researcher, you’ll be pleasantly surprised
at what stuff they come up with. Plus, these projects make for the perfect
lesson on summarization and being concise with language because there’s not a
lot of writing space available. This forces them to ask themselves essential
questions like Is this information relevant? and Is this information important?
In my class, we divided up the research into
categories- new vocabulary, daily life, religion, mummies, pyramids, geography,
Nile, hieroglyphics, and jobs. Then, we all took a category and went to work
researching and collecting data in our theme notebooks. Once we were done
researching, we came together as a class and shared our findings, being sure to
sift out the “meaty” bits that we’d copy into our lapbooks. We aren’t quite
finished with them yet, but they are really coming together nicely and I wanted
to share this small victoryJ
I hope you’re all enjoying your week. Check out the pictures below!
Saturday, March 16, 2013
Landscapes- David Hockney Style
A few months back, I took a wine and canvas
class at our local art studio. It was so much fun, and I was so inspired, that
I decided to replicate it (not the wine part, of course) in my classroom. I’ve
been saving this project for the second semester as a sort of reward for making
it through the first half of the year, and it just so happens that it matched
up perfectly with our earth science unit.
The theme of the lesson was landscapes and how
the beauty of nature is ultimately in the eye of the beholder. Landscape art
and artists are as varied as they come, from Monet to Van Gogh to Kandinsky to Matisse;
all the great artists seem to have had an interpretation of nature. And why
wouldn’t they? So we looked at different styles and interpretations of
landscape art and we looked more in-depth at David Hockney who is known for his
use of vibrant colors in landscapes. The kids then chose a landscape they
wanted to paint, and we went from there.
This art project was quite an undertaking, and I’m
not sure I would do it again, despite the fact that they turned out
beautifully. I suppose I underestimated the time and effort it would take to
get the quality outcome that I wanted. The kids were running out of steam at
the end of our third session, and that’s never a good thing in art, because
then they rush to finish it. It was, however, a good practice in patience and
delayed gratification, which I suppose is beneficial for all of us at times.
Here are some shots from start to finish. Hope you enjoy them!
Thursday, January 17, 2013
Student-led art lessons
One of the things that I love about teaching
older kids is the level of projects that they can handle. Their creative minds
are so open to trying new ideas and exploring new options. It’s so cool to see
what they come up with.
This month, in keeping with the geography theme,
I’ve assigned a neat project for art that allows them to be the teacher.
Basically, they have to choose a famous artist, time period, or piece of art
and teach the other students about it. Then, they do a demonstration on how to
re-create that style and that’s our art lesson for the week. Today’s the first
student art lesson, so I’ll let you know how it goes… Here are the guidelines
and rubric that I made for this project. Have a great weekend everyone!
Art Project Guidelines
Sunday, December 9, 2012
Deck the hallways
Even though it’s not beginning to look a lot
like Christmas here in Vietnam, we are doing our best to get into the holiday
spirit around school. In my class, we’ve been practicing our performances for
the Christmas concert, delivering donated gifts to a local hospital, and even
writing letters to Santa. Aside from trying to wrap up the academic side of
things for the semester, there are also a lot of things to physically prepare
around school like hanging hallway decorations, making props for the concert,
and, of course, transforming your door into something Christmas-y themed. I
have to admit that I’m not excited about all of the extra work that has to be
done this time of the year, but it is really neat for the kiddos.
This year, I don’t have an assistant so when
they announced that we had to start putting up decorations, I panicked. Over
the next two days, everyone’s doors were decked out in snowmen, reindeer, and
every other imaginable holiday icon. I was officially the last one to tackle
the door project, leaving me with limited options. That meant 2 things; 1- that
I’d better hurry up and get something on the door, and 2- that mine had to be
better than the others. Challenge accepted! I grabbed my kids on Friday
afternoon and we came up with a few ideas about what we could do to win the
unspoken door decoration competition that I’d created in my head. Luckily, I
had an hour and a half block for art on Friday and was able to get my students
to do the brunt of the work during that time. They were just like elves,
working away all day to help make our class door the best in school. Here’s a
picture of the (nearly) completed masterpiece…
Thursday, November 29, 2012
Salt Dough Ornaments
Hard to believe it’s Christmas time again
already, but it’s true. To get the kiddos in the Christmas spirit, we’ve been
practicing our carols, decking the hallways, and (my favorite) making those
cheesy ornaments for mom. I’m pretty sure my mom’s still got the ones I made
when I was in elementary school hanging on her tree. I’ll have to remember to
ask. Anywho, they’ve assigned me to the afterschool Art Attack club and we’ve
been working away like elves trying to get these holiday decorations ready to
go before the big concert in 2 weeks. What I love about these is that they
appeal to all ages. I mean really, who doesn’t love baking and painting?
If you’ve never made salt dough ornaments, you haven’t
been living should try it! Here’s the recipe and a few pictures from art
club. Enjoy!
Friday, November 9, 2012
Leaf Art
Sorry for the delay, folks. We have been
incredibly busy this week trying to get the kids back into school mode after
their week off. Not an easy task, I assure you. Anyway, we’ve kicked off our
life science unit with some really exciting stuff. Here’s some art we did
earlier today.
We’ve been talking all week about ecosystems,
biomes, food webs, and habitats around the world and right here in Vietnam.
Because it’s the end of the rainy season, the plants are insanely green and
lush so I thought it would be a great day to do our art class in the elementsJ We headed downstairs to find a
place to plop down and start our sketches. Here’s a few of those:
Later, we collected some samples (to use for our
lesson on classification in the afternoon), headed back upstairs and broke out
the watercolors. I don’t know why, but every time that I try to do a watercolor
lesson, my students insist on using too much paint and not nearly enough water.
I must remember to stress this more in the future. Anyway, they had fun and the
art turned out ok too. I’d say that’s a win for everyone. Here are a few more
shots from the second part of our lesson:
Happy Friday y’all!
Tuesday, October 30, 2012
Halloween Fun
This week we have what we call non-pupil week.
Basically, it’s a full week without students designated to staff development,
training, and time to get caught up on some things and prepare for what’s left
of our first semester. This week couldn’t have come soon enough because I am
worn out from all of the International Day and Halloween festivities!
All last week, we did Halloween themed
activities including reading and writing scary stories, spooky word problems in
math, and even an ICT lesson where the students created a flyer advertising the
Halloween carnival on Friday. It was a ton of fun, but I’m glad it’s over.
Halloween
Word Problems-
We did a review of dividing decimals with a
Halloween twist. You can steal the worksheet here.
Trick
or Treat Bags-
Keeping with the holiday tradition, our school
sets up a route around campus for all the students to go trick or treating.
Each class has to make their own little baskets or bags for collecting candy.
Here’s what we did:
1.
Start with a standard A4 thick paper.
We used white because we wanted to decorate them for Halloween, but you can use
any color you want.
2.
Turn the paper horizontally and fold
each side toward the middle making sure there’s a little overlap. Glue or tape
your seam.
3.
Turn it vertically and fold the
bottom up about 5cm.
4.
Open the bottom section and fold
down to make 2 triangles.
5.
Fold in the tops and bottoms of the
triangle making sure to overlap a little for gluing or taping.
6.
Punch two holes in the top for your
ribbon handles.
7.
Choose your ribbon and decorations.
8.
Viola! You have one super cute trick
or treat bag. Or small, personalized gift bag.
DIY
Ring Toss-
Part of
my job every year is to come up with a carnival game for Halloween and
International Day. Last year, I remember the games being a little too easy for
my students because they’re the oldest, so this year I wanted to try something
a bit more challenging. I used to love going to the carnival or state fair when
it was in town and all those fun games that were nearly impossible to win, but
still fun as hell to play. That was my inspiration for this year’s booth- The
Wicked Ring Toss.
All you need are some empty beer bottles and
small plastic rings and you’re in business. Here’s a picture of mine all
finished:
·
WARNING: This game is A LOT harder
than it looks. Not recommended for kindergartenJ
Paper
Pumpkin Mosaics-
Every Thursday, I run an after-school Art Club
with students from Grade 2-4 and every Thursday I get headaches. I haven’t
figured out if these two things are related, but I think it’s a safe assumption.
Anyway, the club is only 45 minutes so I wanted a project that they could
actually finish. Behold, paper pumpkin mosaics. It’s not my best art lesson,
but they seemed to enjoy themselves and hey, we finished.
Scary
Short Stories-
As promised, here are a couple of the finished
narrative pieces from last week.
FIS Halloween Pics-
Here's a few pictures from Friday's festivities... Hope you all have a great Halloween!
Subscribe to:
Posts (Atom)